
[본 포스팅은 스프링 MVC 2편 백엔드 웹 개발 핵심 기술 편을 기반으로 작성하였습니다.]
스프링 MVC 2편 - 백엔드 웹 개발 활용 기술 - 인프런 | 강의
웹 애플리케이션 개발에 필요한 모든 웹 기술을 기초부터 이해하고, 완성할 수 있습니다. MVC 2편에서는 MVC 1편의 핵심 원리와 구조 위에 실무 웹 개발에 필요한 모든 활용 기술들을 학습할 수 있
www.inflearn.com
[Spring] Bean Validation이란? / 사용해보기
[본 포스팅은 스프링 MVC 2편 백엔드 웹 개발 핵심 기술 편을 기반으로 작성하였습니다.] 스프링 MVC 2편 - 백엔드 웹 개발 활용 기술 - 인프런 | 강의 웹 애플리케이션 개발에 필요한 모든 웹 기술
9hyuk9.tistory.com
이 게시글에서 정보를 받아 Item을 등록하는 것까지는 문제없이 잘 되었다.
하지만 만약 아이템 수정 시에 Item의 검증 조건에서는
id는 NotNull이어야 하고 수량 제한이 없다고 가정한다면
Item 모델 객체는 이렇게 바뀔 것이다.
@Data
public class Item {

    @NotNull //수정 요구사항 추가
    private Long id;

    @NotBlank(message = "공백X") //빈값 + 공백만 있는 경우를 허용하지 않는다.
    private String itemName;

    @NotNull //null을 허용하지 않는다.
    @Range(min = 1000, max = 1000000) //범위 안의 값이어야 한다.
    private Integer price;

    @NotNull
    //@Max(9999) //최대 9999까지만 허용한다.
    private Integer quantity;

    public Item() {
    }

    public Item(String itemName, Integer price, Integer quantity) {
        this.itemName = itemName;
        this.price = price;
        this.quantity = quantity;
    }
}
이렇게 변경하면 수정은 요구사항대로 작동이 잘 될 것이다.
하지만 다시 등록 부분에서는 문제가 된다.
왜냐하면 id는 등록 시에 정해지는데 id를 갖고 있지 않으며 수량 제한 최대 값인 9999도 적용되지 않는다.
동일한 모델 객체를 등록할 때와 수정할 때 각각 다르게 검증하는 방법을 알아보자.
방법은 2가지가 있다.
- Bean Validation의 groups 기능을 사용한다. (복잡해서 잘 사용하지 않는다. 왜냐하면 바로 등록 시 폼에서 전달하는 데이터가 도메인 객체와 딱 맞지 않기 때문이다.)
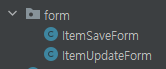
- Item을 직접 사용하지 않고 ItemSaveForm, ItemUpdateForm 같은 폼 전송을 위한 별도의 모델 객체를 만들어서 사용한다. (보통 사용된다.)
groups
순서는 다음과 같다.
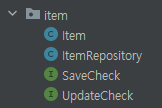
1. 그룹을 묶어줄 인터페이스를 생성한다. (SaveCheck, UpdateCheck)
2. groups로 애노테이션을 인터페이스별로 분리해준다.
@Data
public class Item {

    @NotNull(groups = UpdateCheck.class)
    private Long id;

    @NotBlank(groups = {SaveCheck.class, UpdateCheck.class})
    private String itemName;

    @NotNull(groups = {SaveCheck.class, UpdateCheck.class})
    @Range(min = 1000, max = 1000000, groups = {SaveCheck.class, UpdateCheck.class})
    private Integer price;

    @NotNull(groups = {SaveCheck.class, UpdateCheck.class})
    @Max(value = 9999, groups = {SaveCheck.class})
    private Integer quantity;

    public Item() {
    }

    public Item(String itemName, Integer price, Integer quantity) {
        this.itemName = itemName;
        this.price = price;
        this.quantity = quantity;
    }
}
3. 사용 시 @Validated 뒤에 사용할 인터페이스를 적어준다. (@Valid는 기능 없음)
@Validated(***.class)
@PostMapping("/add")
public String addItem2(@Validated(SaveCheck.class) @ModelAttribute Item item, BindingResult bindingResult, RedirectAttributes redirectAttributes) {

    //특정 필드가 아닌 복합 룰 검증
    if (item.getPrice() != null && item.getQuantity() != null) {
        int resultPrice = item.getPrice() * item.getQuantity();
        if (resultPrice < 10000) {
            bindingResult.reject("totalPriceMin", new Object[]{10000, resultPrice}, null);
        }
    }

    //검증에 실패하면 다시 입력 폼으로
    if (bindingResult.hasErrors()) {
        log.info("errors = {}", bindingResult);
        return "validation/v3/addForm";
    }

    //성공 로직
    Item savedItem = itemRepository.save(item);
    redirectAttributes.addAttribute("itemId", savedItem.getId());
    redirectAttributes.addAttribute("status", true);
    return "redirect:/validation/v3/items/{itemId}";
}
@PostMapping("/{itemId}/edit")
public String editV2(@PathVariable Long itemId, @Validated(UpdateCheck.class) @ModelAttribute Item item, BindingResult bindingResult) {

    //특정 필드가 아닌 복합 룰 검증
    if (item.getPrice() != null && item.getQuantity() != null) {
        int resultPrice = item.getPrice() * item.getQuantity();
        if (resultPrice < 10000) {
            bindingResult.reject("totalPriceMin", new Object[]{10000, resultPrice}, null);
        }
    }

    if (bindingResult.hasErrors()) {
        log.info("errors={}", bindingResult);
        return "validation/v3/editForm";
    }

    itemRepository.update(itemId, item);
    return "redirect:/validation/v3/items/{itemId}";
}
Form 전송 객체 분리
순서는 다음과 같다.
1. Item 모델 객체의 어노테이션 제거(나중에 Save, Update 폼을 만들었을 때 일반 Item 모델 객체를 new로 사용한다.)
Item.java
@Data
public class Item {

//    @NotNull(groups = UpdateCheck.class)
    private Long id;

//    @NotBlank(groups = {SaveCheck.class, UpdateCheck.class})
    private String itemName;

//    @NotNull(groups = {SaveCheck.class, UpdateCheck.class})
//    @Range(min = 1000, max = 1000000, groups = {SaveCheck.class, UpdateCheck.class})
    private Integer price;

//    @NotNull(groups = {SaveCheck.class, UpdateCheck.class})
//    @Max(value = 9999, groups = {SaveCheck.class})
    private Integer quantity;

    public Item() {
    }

    public Item(String itemName, Integer price, Integer quantity) {
        this.itemName = itemName;
        this.price = price;
        this.quantity = quantity;
    }
}
2. Form 모델 객체를 만든다.(ItemSaveForm, ItemUpdateForm)
- ItemSaveForm.java
@Data
public class ItemSaveForm {

    @NotBlank
    private String itemName;

    @NotNull
    @Range(min = 1000, max = 1000000)
    private Integer price;

    @NotNull
    @Max(9999)
    private Integer quantity;
}
- ItemUpdateForm.java
@Data
public class ItemUpdateForm {

    @NotNull
    private Long id;

    @NotBlank
    private String itemName;

    @NotNull
    @Range(min = 1000, max = 1000000)
    private Integer price;

    //수정에서는 수량은 자유롭게 변경할 수 있다.
    private Integer quantity;
}
3. 컨트롤러에서 적용
※어노테이션 및 itemParam = new Item(); 주의
- addItem()
@PostMapping("/add")
public String addItem(@Validated @ModelAttribute("item") ItemSaveForm form, BindingResult bindingResult, RedirectAttributes redirectAttributes) {

    //특정 필드가 아닌 복합 룰 검증
    if (form.getPrice() != null && form.getQuantity() != null) {
        int resultPrice = form.getPrice() * form.getQuantity();
        if (resultPrice < 10000) {
            bindingResult.reject("totalPriceMin", new Object[]{10000, resultPrice}, null);
        }
    }

    //검증에 실패하면 다시 입력 폼으로
    if (bindingResult.hasErrors()) {
        log.info("errors = {}", bindingResult);
        return "validation/v4/addForm";
    }

    //성공 로직
    Item item = new Item();
    item.setItemName(form.getItemName());
    item.setPrice(form.getPrice());
    item.setQuantity(form.getQuantity());

    Item savedItem = itemRepository.save(item);
    redirectAttributes.addAttribute("itemId", savedItem.getId());
    redirectAttributes.addAttribute("status", true);
    return "redirect:/validation/v4/items/{itemId}";
}
- edit()
@PostMapping("/{itemId}/edit")
public String edit(@PathVariable Long itemId, @Validated @ModelAttribute("item") ItemUpdateForm form, BindingResult bindingResult) {

    //특정 필드가 아닌 복합 룰 검증
    if (form.getPrice() != null && form.getQuantity() != null) {
        int resultPrice = form.getPrice() * form.getQuantity();
        if (resultPrice < 10000) {
            bindingResult.reject("totalPriceMin", new Object[]{10000, resultPrice}, null);
        }
    }

    if (bindingResult.hasErrors()) {
        log.info("errors={}", bindingResult);
        return "validation/v4/editForm";
    }

    Item itemParam = new Item();
    itemParam.setItemName(form.getItemName());
    itemParam.setPrice(form.getPrice());
    itemParam.setQuantity(form.getQuantity());

    itemRepository.update(itemId, itemParam);
    return "redirect:/validation/v4/items/{itemId}";
}
이렇게 보면 꽤 간단하게 분리해서 서로 다른 검증을 사용할 수 있는 것을 알 수 있다.
'JAVA > Spring' 카테고리의 다른 글
| [Spring] 스프링 인터셉터란? / 사용해보기 (feat. 비로그인 접근 막기) (2) | 2022.09.21 |
|---|---|
| [Spring] 로그인에 필요한 쿠키, 세션 생성 및 사용법 (서블릿 HTTP 세션) (1) | 2022.09.20 |
| [Spring] Bean Validation이란? / 사용해보기 (0) | 2022.09.19 |
| [Spring] MVC 패턴의 개요 (feat. 사용 예시) (0) | 2022.09.07 |
| [Spring] Bean 스코프의 종류와 사용법 (싱글톤, 프로토타입) (1) | 2022.09.02 |